The Five of Us, Spring 2014


Send Aa to UG and Teach Your Kids About Money at the Same Time!
19 Aug 2011
Hey there, blogosphere! It's my birthday! Yay! 35!
But, better than that, there's only about one month left until Aa leaves for Uganda! I'm sooooooo very excited for him to get to experience some of what I experienced 18 months ago. The sweet, sweet people are life-changers!
To help finance his trip, Aa has made a brand-new design for a money box/bank like we use with our kids (he made theirs too, but this new design is really great!). It's up for auction on Ebay and all the money he makes from it will be put toward his trip fees. The great thing about this bank is that it has three "wells" for the money to go in. The wells are marked (on the lid) share (for donations/tithes), save (to deposit in the bank or other investments at your convenience), and spend (to be used on desires). You can use this tool to discuss the different ways of using money, how to budget, how to be generous, and to pass on your values concerning money with your kids.
We have worked out what we feel is a good system for using this tool. We want to give our kids as realistic a perspective as possible to prepare them for adulthood. I hope this description of what we do will help you determine what will work well for your family.
We give our kids a salary (going to school is their "job") each week; they do not get an allowance for doing household chores because that is just part of being a family. They receive their salary in dimes so that they can easily divide it up into the different uses. We require that some goes in each well each week. They decide what to spend their spend money on and set long-term goals for their savings. They also decide where and when to contribute their give money. Each school year they get a raise and when grades become more meaningful, they will get "performance bonuses" based on their achievements at school. So far, this method has worked really well for our now 6 and 7 year olds.
So, please go to Ebay now and bid on the great tool for a great cause! Thanks!
Farewell, Fireplace! Hello, Baby Space!
4 May 2011
So, I know, I know, taking out a fireplace is a stupid idea from a re-sale perspective, but we didn't make this decision lightly. It was time for it to go. We never use it, never liked it. It took up valuable real estate in our slightly cramped living areas (we have big bedrooms, though!). And, most pointedly of late, it was a baby hazard. So out it came and, once again, we rearranged furniture, creating a spacious dining area (in the official dining room, of all places!), a formal living room/library, and a family room with the huge sectional another couch, my desk, and room for all the baby's "furniture" (jumperoo, activity gym, etc.).
Now you see it... Well, sorta. This is the best--the only--"before" pic I could find with the fireplace in it. It's like a "Where's Waldo." If you haven't found it yet, look to the left behind all the stuff that's piled up there. That's actually a pretty accurate state of affairs. Now you don't!

 I took the last pic above at the end of the day when we had most of the furniture where we wanted it, but a lot of the clutter was still seeking it's new home. So, yeah, it looks a little better now. :)
While Mama and Daddy were busy moving furniture and the bigs were busy playing outside, poor baby Pup was stuck safely away in his jumperoo. Apparently, we weren't watching the clock and worked right through naptime!


Projects Again
24 April 2011
I dunno what it is with us, but we seem to go from house project to house project. Only a baby seems to interrupt the flow. :)
The latest target has been our useless fireplace. It was always in the way, never used, never wanted, and about to become a baby hazard. So, out it came! The bigs were thrilled with their superhero: Destructo-Dad! They thought it was so fun that Daddy was ripping into the wall, tearing off tiles. Baby Pup wasn't so sure about all the noise. And Dexter (our dog) really didn't know what to make of all the commotion.
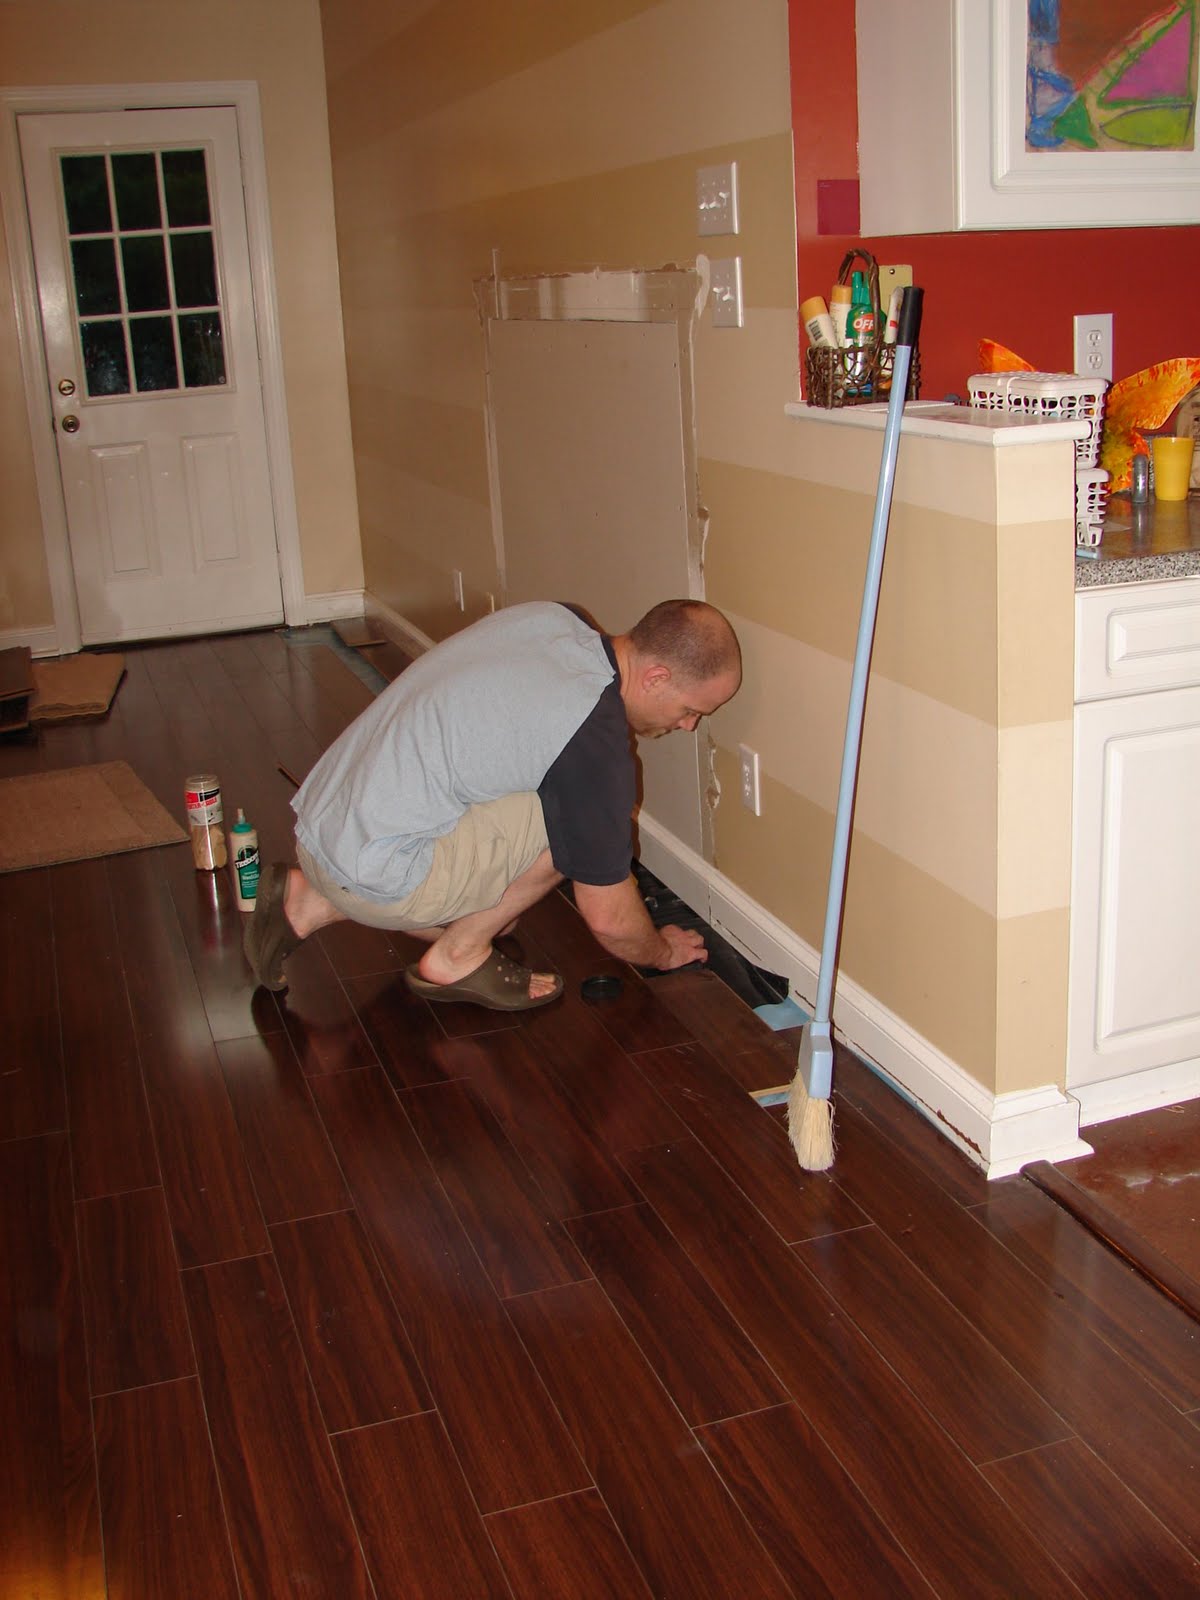
The bigs were very interested in helping with the project, so Aa let them help with the clean-up! They did a good job and certainly had fun with it! So far, Aa was able to match the baseboard trim after 3 or 4 trips to the big box stores. He stuck the new drywall piece in, filled in the flooring where the tile hearth was (with only 4 inches of materials to spare!), and mudded up around the hole. The bigs are thrilled with their dad's destructive powers, but I am soooooo glad he has what it takes to put things back together better than before!
 Of course, painting over the hole is the next step. Then the furniture will need to be rearranged (again). And, the kitchen and dining room are getting new paint--"front door red"!!! I'm excited about all the changes. Oh, and Aa says the gas line from the fireplace might get linked to a new gas cooktop maybe next year! Woohoo!
My Diabolical Plan
23 March 2011
This afternoon Punk was playing with Pup. Ever the sentimental, expressive, emotional, drama prince, he was gushing about how fun Pup is, how sweet and cute he is, etc. This fountain of love culminated in a plea for another baby ("A GIRL!!!" Pea interjected) soon! This isn't a new request. A few weeks ago Punk and Pea settled on the number of babies it would take to make our family complete: 15. That's 15 new babies. It doesn't include the three children we have now. A family of 20, apparently, is a complete family!
But, I digress. In response to Punk's effusions, I decided to unveil a little plan I've been cooking up. I said, "Well, you know, Punk, the more babies there are, the less time Mama has for doing things around the house. And, since they still have to be done, that means that the big kids get to do them."
He was excited, "Yay! I get to boss Pea around!"
"Well, no, because this still doesn't mean you're the parent. It just means that you'll get to help the family more. In fact, I'm going to teach you both some new chores during Spring Break. We'll do lots of fun things, too. But, each week (they get 3 weeks off because they are in year-round school) I will teach each of you a new job and we'll spend the week learning it. Then, when you go back to school, you'll be experts and you'll be able to do the jobs yourselves!"
I didn't get as much flack as I expected (hooray!), but that doesn't stop me from expecting it when we get busy with it! Aa and I will be deciding on some jobs that Punk and Pea can be taught to do and I'll be making a chore chart. I'm actually looking forward to it!
Anyone out there got some suggestions for jobs a 5.5 and 6.5 year old can do? They already help set the table, feed and water the dog, take the dog to the yard to do his thing, and put away their own laundry. They've also been helping me wipe down their bathroom and I think they are ready to have that handed over too. So, what do your kids do for chores?
Nightstands
 Aaron always has to have a project going. So, as soon as he finished the bookshelves, he started on the nightstands. He used the same mahogany and they turned out beautifully. The tops are particularly stunning--they seem to glow in the light. These photos don't do them justice.

 Remember when I went to Uganda last February to help choose a village for our church to adopt? Well, we're sending another delegation in the fall to support the work going on there and Aaron would like to go! So, he's looking for ways to finance his trip. If you've always wanted a piece of custom furniture or a knick-knack box or anything made of wood, let us know and we'll see what we (or he!) can do in exchange for a donation toward his trip!
Final Cake for Class 2


Flowers, Part 2
 I thought maybe the details would show up better without the flash. Maybe.
So, next week will be the last session of this class already! And we have to do another "final cake." We'll also learn daffodills and lillies next week, along with the basketweave. Gonna be busy!
Dream a Little Dream With Me

So, that's not terribly exciting. BUT, what is a little exciting about this whole cake dec business is that I actually have some business! :) Aa has been saying my cakes and cookies are worth money and that I should start a little word-of-mouth business. And, well, my best friend in town has actually hired me for a small job! Woo hoo!
In the meantime, Aa and I have been dreaming a bit about the future of this baking business. He suggested that some portion of the proceeds go toward charity (ending the rampage of AIDS in Africa is a cause that runs in my veins). I like that idea. So, we've been batting around a few names for my bakery-that-is-not-yet. Our favorite idea so far is Sweet Hope Bakery. But, I'm hoping one of my faithful readers will suggest the winning name. So, get to work thinking of some good ones and leave a comment for me. If I pick your idea, I might just have to give you a prize or something!
Overlooked
 My next fave detail is the crown moulding. It's just scrumptious, isn't it? And the top is solid so when I get some gewgaws to go up there, they won't disappear!
 And, now the moment you've all been waiting for (for a couple months, evidently!). . . The big picture!
This leaves our happy little twosome in two different (but equally happy) places:
Him: Never one to be projectless, Aa has begun work on matching bedside tables (also mahogany) for our bedroom.
Her: Considering employment for the sole reason that I think that might mean I could afford to hire someone else to dust all those new horizontal surfaces. In the meantime, anyone want to trade their services for a cake?
TAAAAA-DAAAAA!!!!!!!!


This Monday--a new class--Flowers and Cake Design! Should be even more fun!
Monday Madness


All in all, I think it turned out pretty good. And now I have most of a cake and piles of frosting in my fridge. Who's coming over? :)
Back to School

Rearranged
7 September 2010
Early last week A said to me something about rearranging the furniture. I love to rearrange furniture. It makes everything feel fresh and new. But, I felt I had created the optimal arrangement when we first moved in. And moving one of our living spaces would mean moving three. A big job. So, I told him he should get out his beloved graph paper and map each room (formal living, dining, and family rooms), then cut out little movable squares and rectangles representing (to scale, of course) each piece of furniture so that I could see if it would work.
 Looking toward the back door into the family room/great room
 The formal living room
 And NOW...
 Another look into the new family room. Obviously, we need to do something about the art on the wall to the left. A little spare!
 And here is the new long room! :) You can just see the edge of the flowered couch up close. This arrangement facillitates easier feeding/gathering of groups larger than 8.
 A nice private seating area if you need it, but never far from the action. I would like a little area rug in that corner. Maybe a round one? I love that my maps there to the left can be easily studied. There are some interesting things in those old maps!
 And looking back into the house from the back door, you can now see the flowered couch. Very easy to pull the dining chairs around after dinner for discussion. I would like to have a rug over there under the couch and coffee table. The "curtains" are a sari I picked up in India and have never been able to use before! The other window needs to be dressed somehow, though.
All in all, I think I like it. It has yet to be small-group tested, but it's working well for the family so far!
A "Job"
I was commissioned for my first "job" on Friday. My very dear friend asked me to make two dozen cupcakes for a party on Monday. Confetti cupcakes, to be precise. Frosting up to me.
Not having a confetti cupcake recipe, nor even a white/yellow cake recipe to start with, I hit the internet. The first recipe I tried was a bust. The flavor was slightly off and the texture was waaaaaay off. Bummer.
So, my dear husby recommended I try the America's Test Kitchen website. I found a basic yellow cake recipe, conferred with Joy of Cooking to make sure a cake is a cake no matter what size pan you bake it in, and set to work on round two. The recipe was just complicated enough to make it worth the effort (if it's really no different from the dump-and-mix of a box, what's the point really?), and the effect was perfect-o!
On to the frosting. Good ol' World's Best Frosting never lets me down. It's perfect with everything and I simply adore it. Unfortunately, it's a secret recipe and so, sadly for you, I cannot publish it for all the world to see. You'll just have to make friends with me. And, of course, make me an offer I can't refuse. There are a select few out there who have wheedled it out of me.
But I digress. The party is a going-away send off for a staff member of our church. Somehow sunny yellow seemed the way to go (saying goodbye can be filled with mixed emotions, but cupcakes must always be happy). I was aiming for "smiley face yellow" (if you knew the guest of honor, you'd know there's really no other option) but landed somewhere in the range of Peep yellow instead. Oh well. Still cute. For the finishing touch (as Punk would say with flair), confetti cupcakes would be embarrassingly naked without sprinkles. Jimmies seemed too. . . childhood sundae, so I used nonpareils (had to check the spelling on that one) to bring the elegance up to adult standards (is that snickering I hear? Unfortunately, I cannot explain how I became a sprinkle-snob, nor how I came to the conclusion that teeny-tiny brightly-colored sugar balls are more adult than elongated brightly-colored sugar rods). I was pleasantly surprised to discover that using the decorators' tip created little ridges for the nonpareils to cling to. I only wish I had thought of it instead of stumbled upon it. Anyway, I think these little beauts are just the thing!
Oh, yes. I can give you the cake recipe, since it is already available for free on the wonderful world wide web!
America's Test Kitchen's Fluffy Yellow Layer Cake
Makes two 9-inch cake layers or 24 cupcakes
Nonstick cooking spray can be used for greasing the pans (proceed with flouring as directed). Bring all ingredients to room temperature before beginning.
Ingredients
2 1/2 cups cake flour , plus extra for dusting pans
1 1/4 teaspoons baking powder
1/4 teaspoon baking soda
3/4 teaspoon table salt
1 3/4 cups sugar (12 1/4 ounces)
10 tablespoons (1 1/4 sticks) unsalted butter , melted and cooled slightly
1 cup buttermilk , room temperature
3 tablespoons vegetable oil
2 teaspoons vanilla extract
6 large egg yolks , room temperature
3 large egg whites , room temperature
1/4 cup rainbow jimmies, if making confetti cake
Instructions
1. Adjust oven rack to middle position and heat oven to 350 degrees. Grease two 9-inch-wide by 2-inch-high round cake pans and line bottoms with parchment paper. Grease paper rounds, dust pans with flour, and knock out excess. (Or, for cupcakes, simply line 24 wells in cupcake pans with paper or foil liners.)
2. Whisk flour, baking powder, baking soda, salt, and 1 1/2 cups sugar together in large bowl.
3. In 4-cup liquid measuring cup or medium bowl, whisk together melted butter, buttermilk, oil, vanilla, and yolks.
4. In clean bowl of stand mixer fitted with whisk attachment, beat egg whites at medium-high speed until foamy, about 30 seconds. With machine running, gradually add remaining 1/4 cup sugar; continue to beat until stiff peaks just form, 30 to 60 seconds (whites should hold peak but mixture should appear moist). (Just so you know, mine took FOREVER to become stiff peaks!) Transfer to bowl and set aside.
5. Add flour mixture to now-empty mixing bowl fitted with whisk attachment. With mixer running at low speed, gradually pour in butter mixture and mix until almost incorporated (a few streaks of dry flour will remain), about 15 seconds. Stop mixer and scrape whisk and sides of bowl. Return mixer to medium-low speed and beat until smooth and fully incorporated, 10 to 15 seconds.
6. Using rubber spatula, stir 1/3 of whites into batter to lighten, then add remaining whites (and jimmies, if using) and gently fold into batter until no white streaks remain. Divide batter evenly between prepared cake pans. (I had enough left for each of us to have a couple tasting spoons, but I think I could have filled the cavities a little bit more than I did and still come out alright.) Lightly tap pans against counter 2 or 3 times to dislodge any large air bubbles.
7. Bake until cake layers begin to pull away from sides of pans and toothpick inserted into center comes out clean, 20 to 22 minutes. (Somehow 20 minutes worked perfectly for my cupcakes too.) Cool cakes in pans on wire rack for 10 minutes. Loosen cakes from sides of pans with small knife, then invert onto greased wire rack and peel off parchment. Invert cakes again and cool completely on rack, about 1 1/2 hours. (Of course, if you're making cupcakes, simply lift them out--and they won't take as long to cool either.)
Retrospective, Part 4

 A good detail shot where you can see the stitches well. I'm really pleased with the dimensionality the quilting is providing.
 I'll keep you updated on the quilt and the adoption as things progress!
My Man and Me

married 7/7/2001
Punk

ours through biology, born 7/25/2004, home 8/1/2004
Pea

ours through adoption from Liberia, West Africa, born 7/15/2005, home 10/25/2007
Pup

ours through domestic adoption, born 1/15/2011, home 2/10/2011, final 8/3/2011
Get Blathered


 Posts
All Comments
Posts
All Comments
Get Free Stuff!

Where You're From
